AI-generated TLDR
Image optimization is crucial for WordPress website performance and search engine ranking. Utilizing descriptive “alt text” allows Google to understand image content, improving accessibility and visibility. Reducing image file sizes through compression significantly speeds up page load times, a key factor in user experience and SEO. These techniques, alongside WordPress-specific SEO practices, directly contribute to increased organic traffic. Prioritizing image optimization—including file naming, size, and format—is a practical strategy for enhancing a website’s overall search performance and attracting more visitors.
Image SEO is something underrated that’s in fact simple and when done right can lead to some unexpected traffic surge.
There are a bunch of rules you have to follow every time you use an image to ensure that you’re increasing your chances at SEO.
Here are the most important of them:
1. Naming
You’ll have to name each image file you use appropriately to what it shows, this will help you rank in the “images” section in Google and hopefully get some traffic from there
Example:
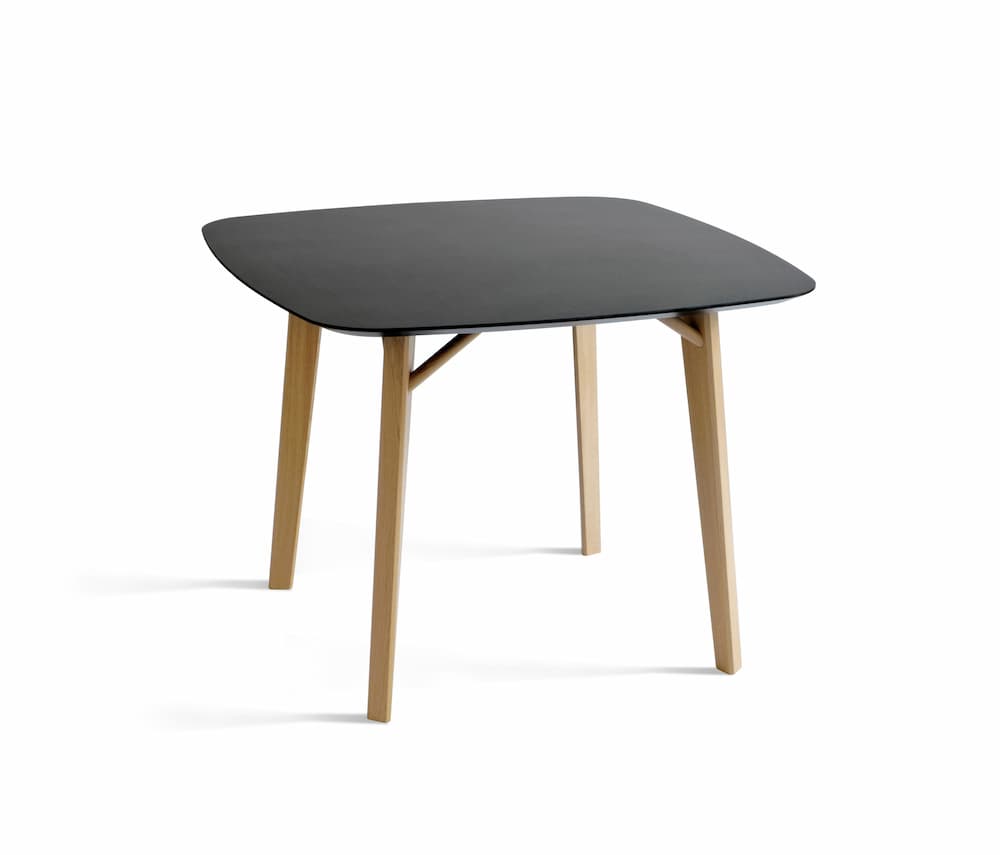
You can put lots of different name variations on this pic but the correct one would be a descriptive one. Something along the lines of: “black wooden table” should work well.
Again, you have to only change the name of the file before you upload it, nothing else.

That is all you need for file naming.
2. Alt text (Alternative text)
Here basically you have to write what is happening in the picture. It helps Google contextualize what is on the image. Using the picture above as an example alternative text should be something along the lines of “black table made of wood sitting in the middle of the room”.
So the difference between the title and the alternative text is that the alternative text needs more context.
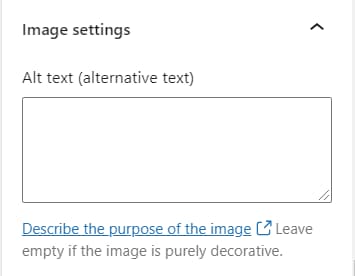
This is what the alt text field looks like on WordPress. The picture above shows where you add the text.
Alternatively, you can also
3. File format
Website speed is one of the most important things to Google. This will be almost impossible without having properly resized and compressed images.
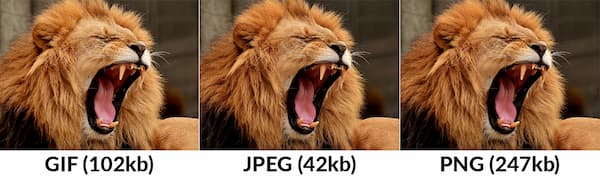
But before we compressing and resizing your images you have to ensure that you’re using the correct file format. The difference can be big:
As you can see from the image above. All 3 files look exactly the same but JPEG is much smaller in size compared to the others. That should be your preferred choice.
4. Resize your images
Most images you’ll find on websites for stock images are way too big and you’ll have to resize them before uploading. You can use tools like:
Or you can ask a designer to give you a hand with this. It’s easier than it seems, trust me. You can try making the image 50% or even 75% smaller and see how it looks. If it’s pixelated then you’ve probably made it too small.
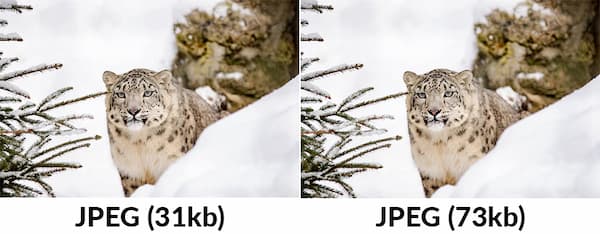
5. Compress images
Now compressing images is basically reducing the file size of an image. The goal here is to reduce the file size WITHOUT losing too much of the quality
Basically, all you have to do is just upload the picture to one of the tools below and the tool is going to do the magic itself:
If you want to go deeper into the topic here are a bunch of articles I like:
Notes
- Published: July 13, 2021
- Author: Ves Ivanov
- Source URL: https://vesivanov.com/blog/simple-image-seo-guide